
Beginner soap-making tools aren't about cute gadgets; they're your safety net and your shortcut to bars that don't flop.
Most rookies waste cash on shiny extras, then panic over lye splashes and sticky molds. Get the basics right, and the hobby stops feeling like chemistry class gone rogue.
Safety Equipment
New to lye? Cool -- let's keep your skin and eyes intact. This safety gear list fits right alongside your beginner soap making tools and keeps mistakes small, not scary. Soap Craft Lab built these picks around real beginner habits: rushing, multitasking, and forgetting what caustic means.
Safety Goggles and Rubber Gloves
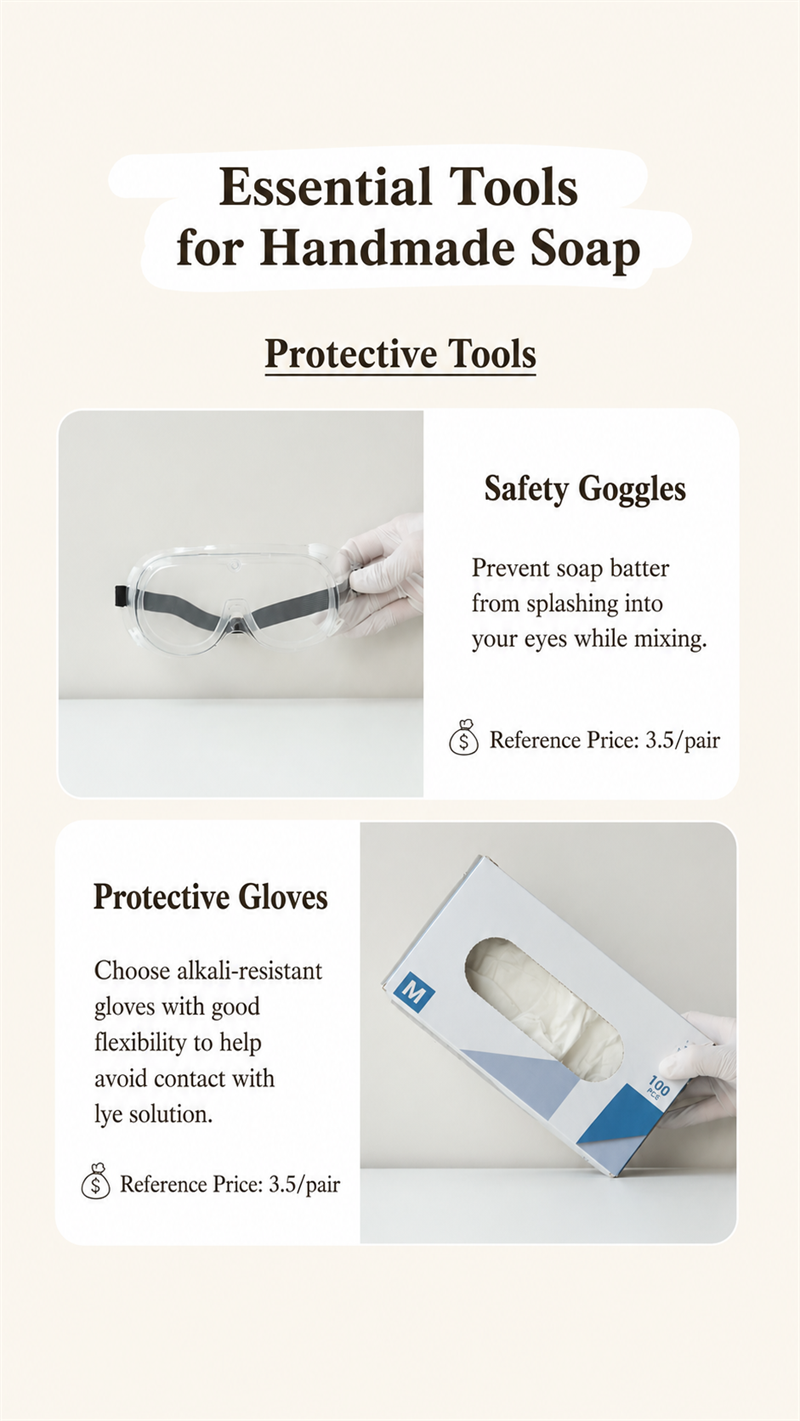
Your beginner soap-making tools can be perfect, and you can still get nailed by a single splash. So treat eye protection and hand protection like non-negotiables.
Safety Goggles: Fit and Habits
- Fit check: look for a sealed rim for splash protection, not open-side shop glasses. Adjust the strap so you can shake your head, and they don't slide.
- Use habits: put them on before you open the lye, not right after I measure.
Rubber Gloves: Material and Coverage
- Material matters: pick chemical-resistant gloves (nitrile or heavy-duty rubber) that don't feel flimsy.
- Coverage: a longer cuff helps when you're reaching into a pitcher or wiping drips.
- Heat + lye reality: mixing can get hot; solid gloves keep your hand protection steady when you're moving fast.
For anyone building out beginner soap making tools, this pair is the boring stuff that saves the day.
Apron and Long-Sleeved Shirt
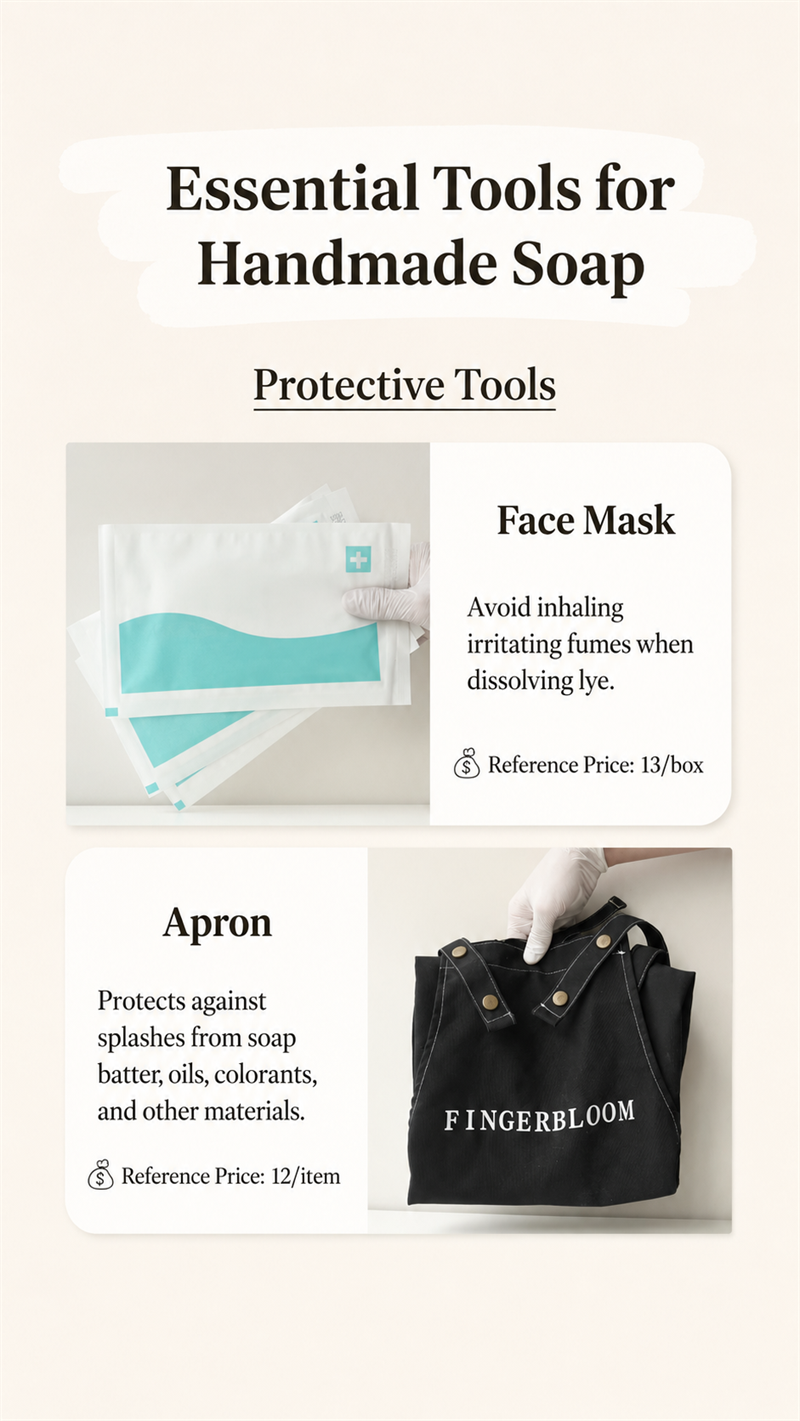
Here's the sneaky part: lye doesn't only splash upward. It runs, it drips, it finds your waistband.
Protective Clothing Basics
- Apron: go for a chemical-safe apron that doesn't soak through fast. Tie it snug so it doesn't swing into your batter.
- Long-sleeved shirt: a plain long-sleeved shirt gives body coverage and a real skin barrier. Skip loose sleeves; they love knocking over cups.
Soap Craft Lab: If you wouldn't wipe lye on that fabric, don't wear it as fabric protection. If you can't wash it hot, it's not your soap outfit.
Soap Craft Lab calls this the spill-proof uniform, and it belongs with your beginner soap making tools every single batch.
Face Masks and Respiratory Protection
A face mask helps, but only if you stop treating it like magic armor. Add it to your beginner soap making tools, then use it with a plan.
- Pick the right kind of respiratory protection: a well-fitted mask that seals around the nose and cheeks.
- Mix lye slowly; less dust means fewer airborne particles.
- Stand back as you pour -- keep your face out of the rising plume of chemical vapors.
- Pair the mask with ventilation: open window, moving air, no closed kitchen mixing.
Soap Craft Lab: If your throat stings, pause. That's your cue, not a challenge.
Soap Craft Lab also suggests labeling your mask so it doesn't end up used for sanding, paint, and random garage stuff.
Emergency Ready: Ventilation Fan and First Aid Kit
Careful isn't a safety plan. Real emergency preparedness means having gear placed where you can grab it with slippery gloves on, right next to your beginner soap making tools.
Air Setup
- Ventilation fan: aim for steady air circulation that pushes fumes away from your face. Place it so it doesn't blow dust into your oils.
Response and Cleanup Setup
- First aid kit: build it for soap risks -- minor burn treatment, rinse supplies, and simple tools. Add a printed what to do if lye hits skin/eyes card, because stress makes people forget.
- Spill cleanup: keep paper towels close; have a dedicated trash bag; store extra gloves so you can swap fast.
Safety Supplies Quick Reference
| Safety Supply | Keep It (meters from lye station) | Replace/Check (days) | Notes |
|---|---|---|---|
| Ventilation fan | 1.0 | 30 | Confirm airflow direction |
| First aid kit | 2.0 | 60 | Restock rinse supplies |
| Spill towels | 0.5 | 14 | Replace if damp/dirty |
| Extra chemical resistant gloves | 0.5 | 90 | Check for pinholes |
With these safety supplies locked in, your beginner soap making tools setup feels less like a science experiment and more like a chill weekend hobby.
Measuring and Heating Tools
Getting your beginner soap-making tools right from the start saves stress, wasted oils, and those why did this seize moments. This guide breaks down beginner soap-making tools for measuring and heating, so your soap-making tools for beginners actually work with you, not against you.
Precision Weighing With a Digital Scale
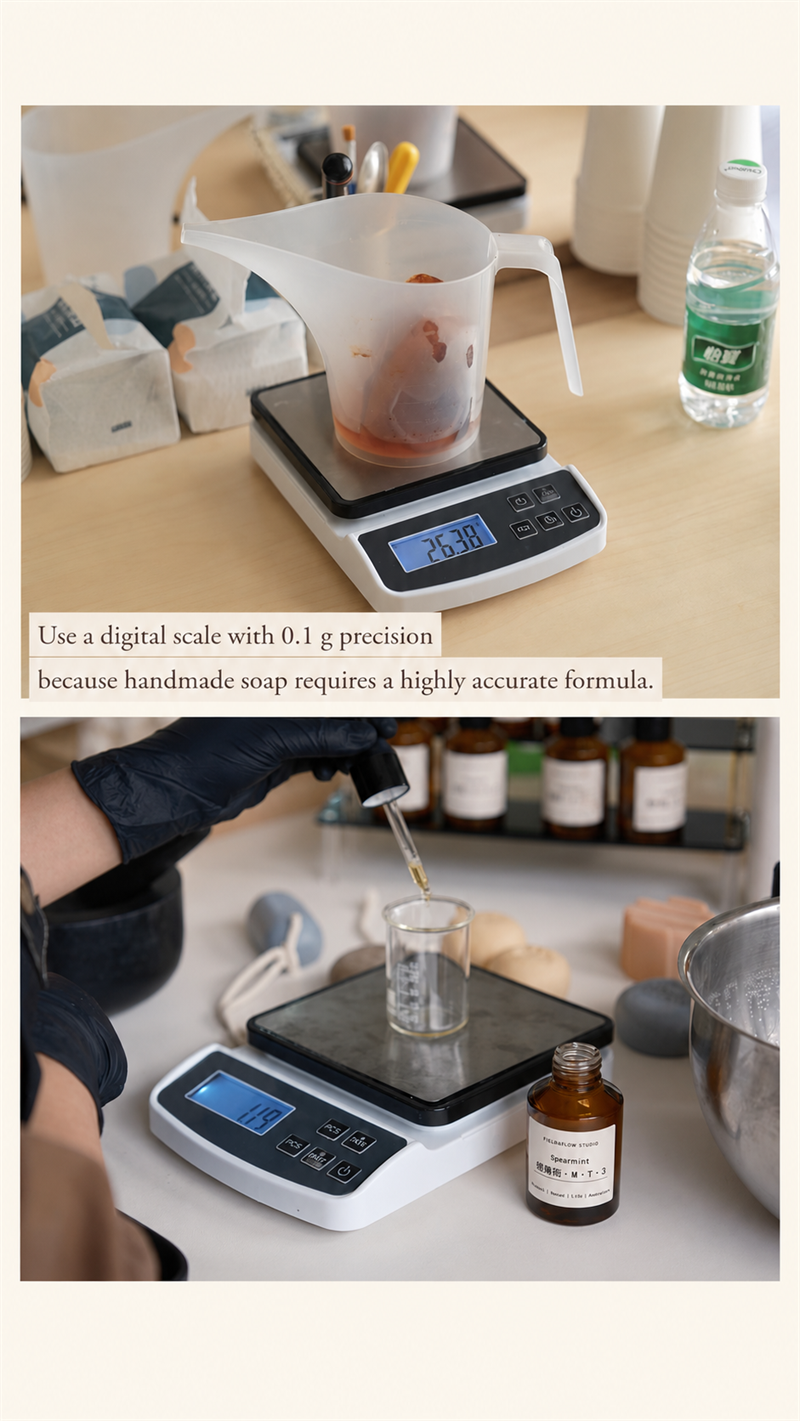
When building a solid lineup of beginner soap-making tools, a digital scale sits at the top. Soap isn't baking. A tiny shift in grams can throw off saponification, leaving you with lye-heavy bars or oily leftovers.
Set Up for Accuracy
- Place the digital scale on a flat, stable counter.
- Check the unit setting -- toggle between grams and ounces depending on your recipe.
- Confirm the battery life is strong; low power can skew accuracy.
Use the Tare Function
- Put your container on the platform size area.
- Press tare function to zero it out.
- Add oils slowly until the display matches your target weight.
Optimize Your Workflow
- Use one container for oils, one for lye solution ingredients.
- Wipe spills quickly to protect the scale's accuracy.
Soap Craft Lab: Bigger platform size means fewer balancing tricks with wide bowls.
Many soap makers upgrading their soap-making equipment say switching from volume to weight changed everything. It's not dramatic -- it's just dependable.
At Soap Craft Lab, scales selected for beginner soap making tools are tested for repeatable accuracy, because guessing isn't part of good soap.
Heat-Resistant Thermometers
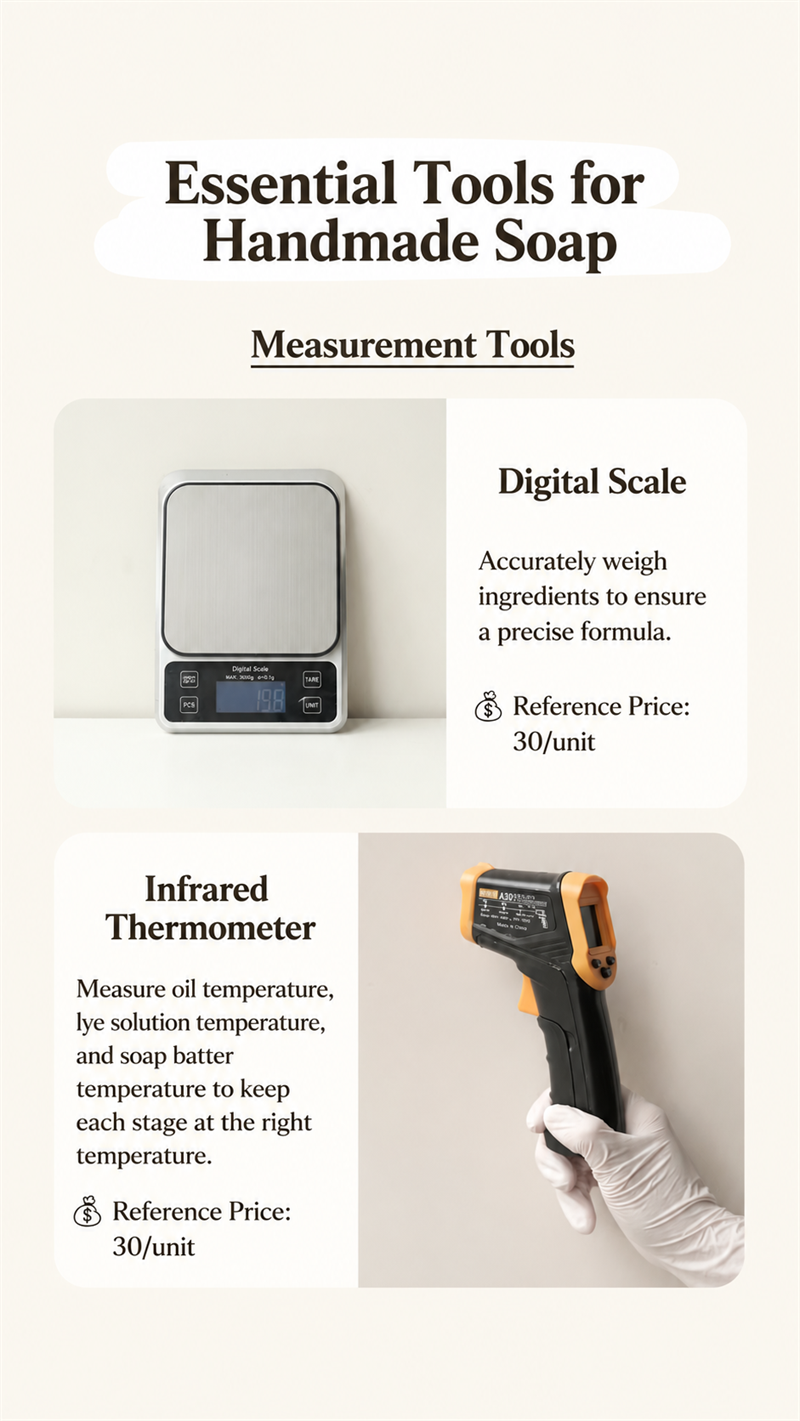
Temperature control can make or break your batch. A thermometer built to be heat-resistant keeps your process steady when working with hot liquid oils and a fresh lye solution.
Why Temperature Matters
- Oils too hot? Fragrance burns off fast.
- Lye too cool? You risk false trace.
- Outside the accuracy range? Emulsion gets unpredictable.
How to Monitor Properly
- Insert the temperature probe fully into your liquid oils.
- Record the reading.
- Repeat for the lye solution.
- Aim for a balanced trace temperature within your recipe's target zone.
Choosing the Right Thermometer
- Wide accuracy range.
- Durable heat-resistant body.
- Easy-to-read display.
- Quick response temperature probe.
According to a 2025 Grand View Research report on home crafting trends, demand for precision kitchen-style measuring devices in DIY beauty has continued to rise, driven by hobbyists prioritizing control and consistency.
The DIY personal care market is seeing sustained growth as consumers seek higher quality and ingredient transparency, notes Grand View Research (2025), highlighting increased spending on accurate home tools.
In plain terms: better readings mean fewer ruined batches. For beginner soap-making tools, this one quietly protects your time and ingredients.
Measuring Cups and Spoons
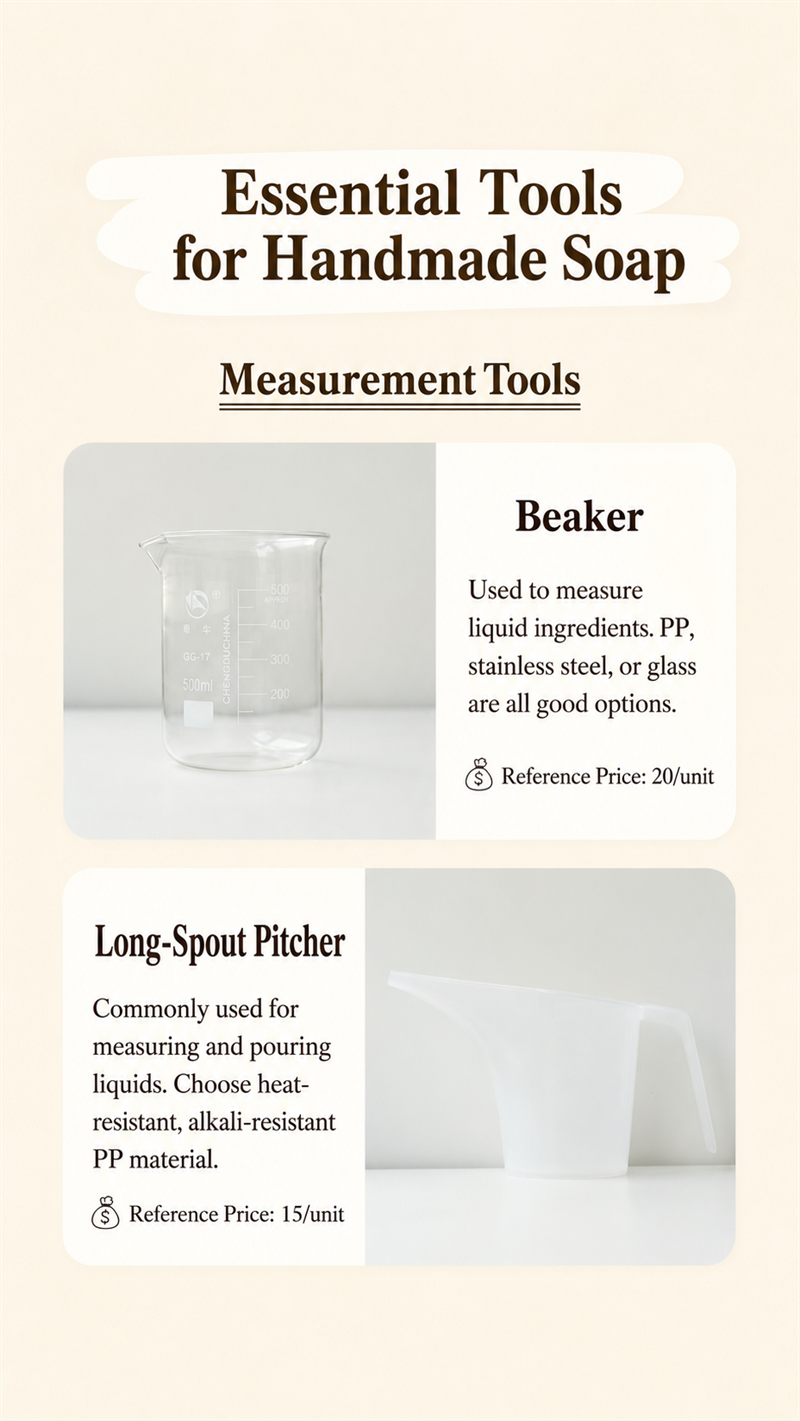
Not every ingredient needs a scale. Colorants, botanicals, and fragrance blends often rely on measuring cups and measuring spoons.
What to Look For
- Clear markings that won't fade.
- A full set covering small to large volumes.
- High durability under frequent washing.
Liquid vs Dry Measures
- Liquid measure cups usually have a spout and space above the line.
- Cups for dry ingredients allow leveling for consistency.
Small Habits That Make a Big Difference
- Keep one set only for soap.
- Check clear markings regularly.
- Replace warped plastic -- low durability leads to inconsistent fragrance loads.
For soap-making tools for beginners, consistency builds confidence. When your lavender smells the same batch after batch, it's not luck -- it's measurement discipline.
Stainless Steel Pots vs Microwave-Safe Bowls
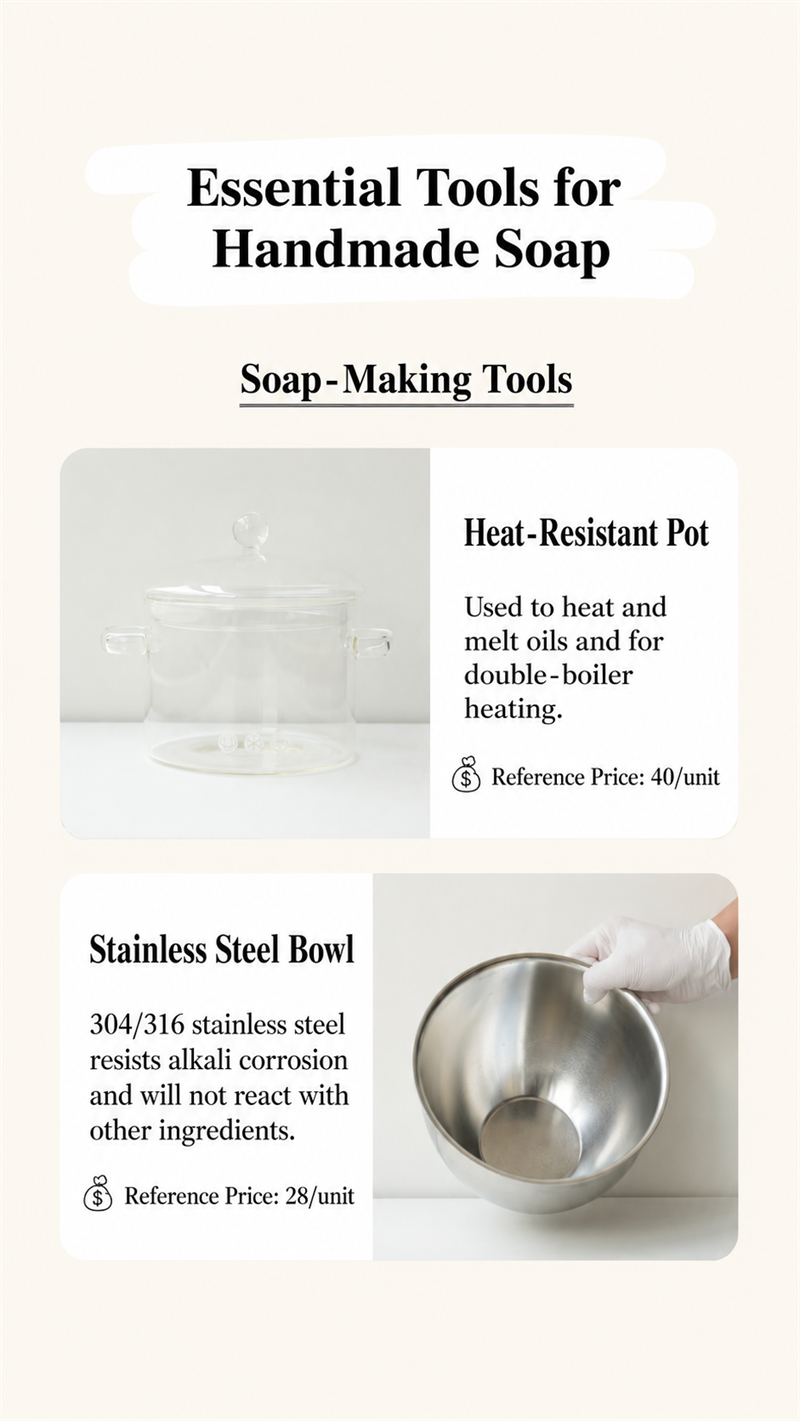
Heating oils safely is non-negotiable in beginner soap-making tools. The container matters more than most expect.
Stainless Steel Pot
- Material and safety: non-reactive stainless steel pot resists lye corrosion. Strong material safety for direct stovetop heating.
- Performance: even heat distribution reduces scorching. Larger capacity handles full loaf batches.
- Maintenance: high durability. Straightforward cleaning with warm water and mild detergent.
Microwave-Safe Bowl
- Material: labeled microwave-safe bowl only. Confirm material safety before use.
- Use case: ideal for melting small oil portions. Controlled bursts improve heat distribution in short intervals.
- Practical notes: moderate capacity works for test batches. Easy cleaning, though long-term durability varies.
Soap Craft Lab: Big batch? Go with a stainless steel pot. Small trial run? A microwave-safe bowl keeps it simple.
For beginner soap-making tools, smart heating choices prevent scorching, warping, and surprise reactions. And when your tools behave, your soap does too.
Mixing and Blending Tools
If you're shopping for beginner soap-making tools, mixing gear is where the messy hobby turns into a clean routine. A few smart picks keep splashes down, help your batter behave, and make cleanup less of a mood-killer. Soap Craft Lab keeps it simple: choose tools that match your pace, not someone else's.
Immersion Blender vs Stainless Steel Whisk
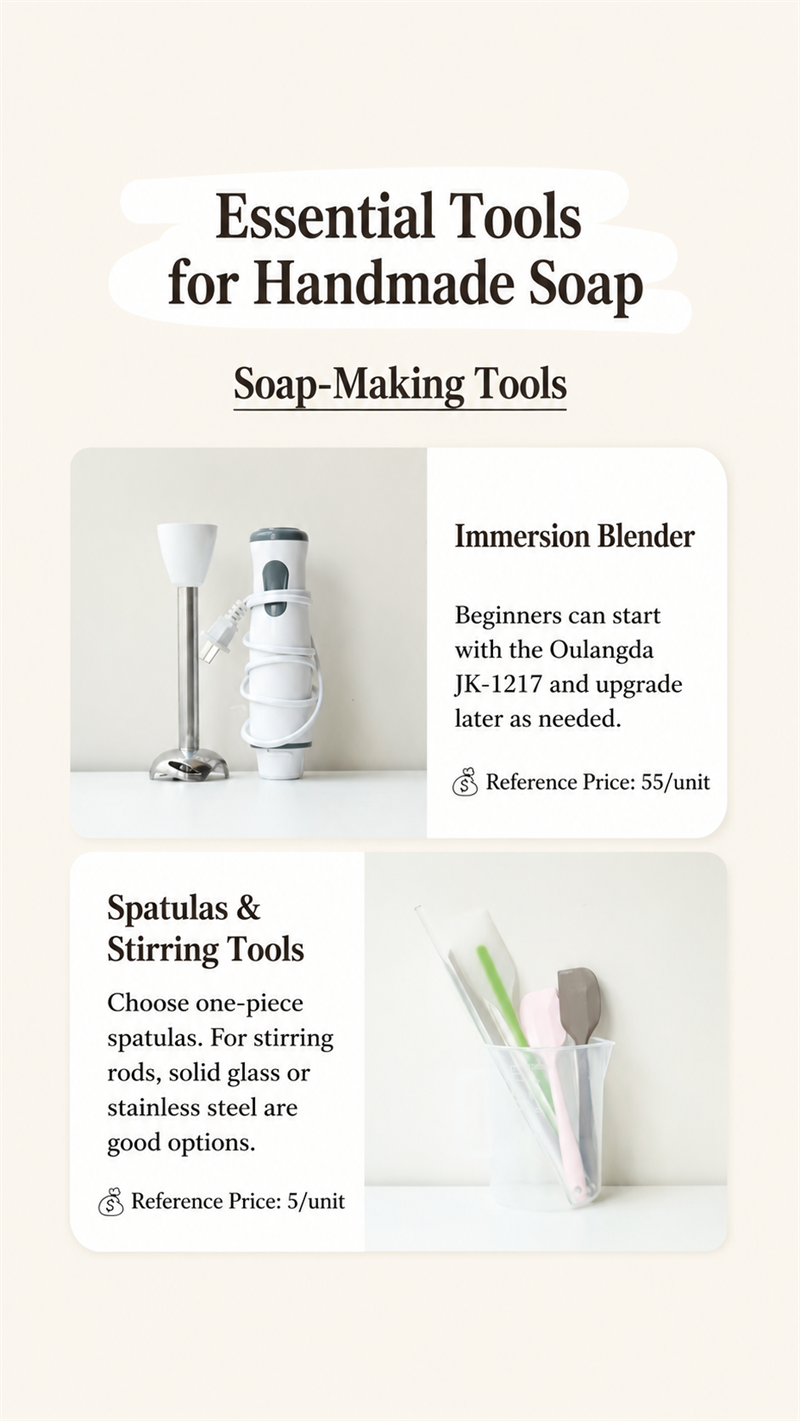
For beginner soap making tools, this is the big fork in the road: speed or control, punchy power or a calmer rhythm.
Emulsification Goals
- With an immersion blender (aka stick blender / hand blender): you drive fast, tight mixing, pushing oils and lye into a stable blend before they try to separate. Your soap batter usually hits trace sooner, which is great when you want consistency and fewer surprises.
- With a stainless steel whisk (a classic wire whisk): you feel every change as it thickens; it's slower, but it's honest. That slower climb to trace can protect delicate swirls that hate sudden thickening.
Design and Pacing
- Quick-and-done batches: immersion blender.
- Slow-and-steady patterns: stainless steel whisk.
If you're building a starter kit of beginner soap making tools, Soap Craft Lab usually points new makers toward a stick blender for reliability, then a wire whisk for the days you want to take your time.
Large Mixing Bowls
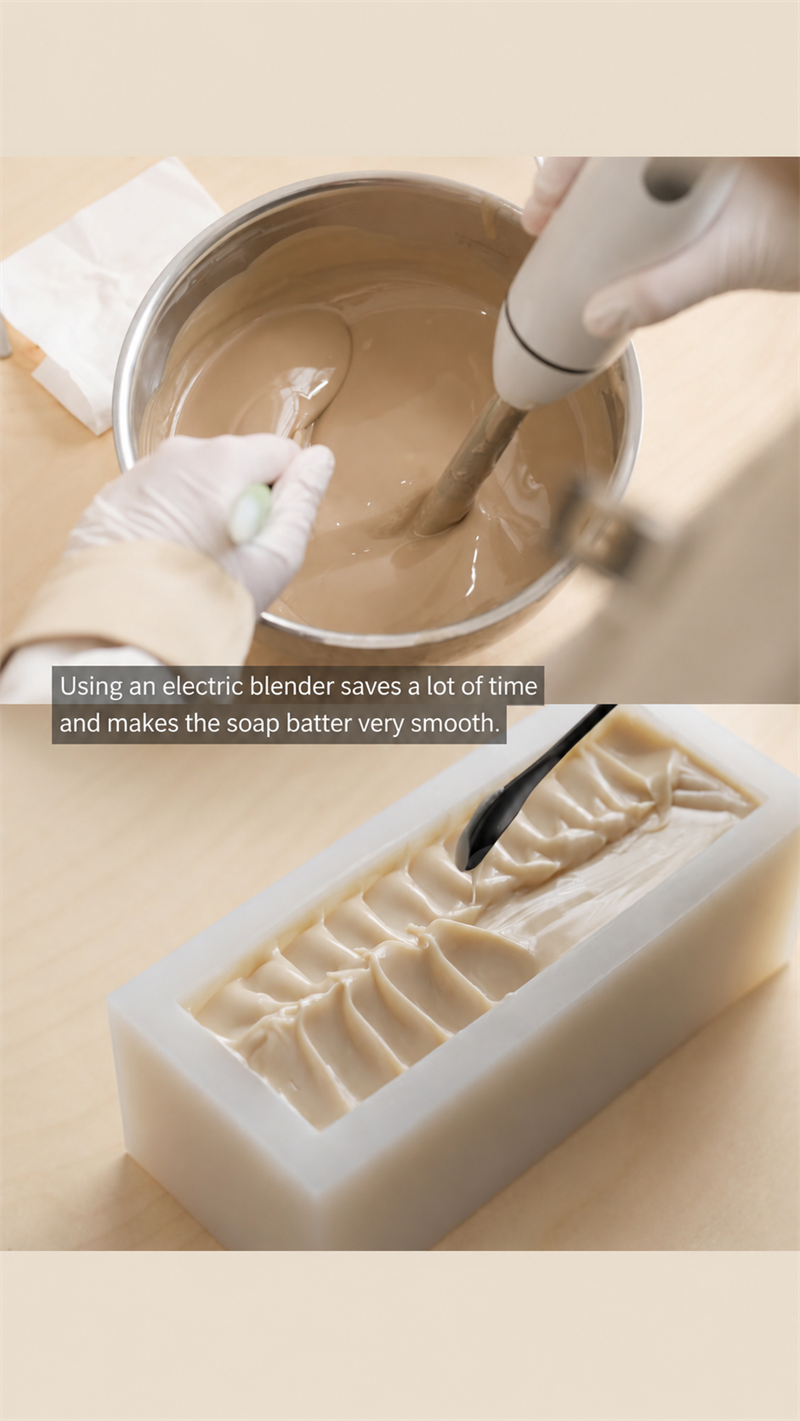
A roomy mixing bowl is one of those beginner soap making tools that doesn't sound exciting until you skip it once and regret everything. Big bowls keep your soap making area calmer, and they give your arms space to work without slinging batter up the sides.
Pick the Bowl Style That Fits Your Routine
- Stainless steel bowl: tough, easy to clean, and not fussy about tools.
- Glass bowl: lets you see streaks, but go for thick glass.
- Silicone bowl: lightweight and grippy; handy when your counter gets crowded.
Check the Practical Stuff Before You Buy
- Large capacity so mixing doesn't turn into splash roulette.
- Heat resistant material, because warm oils plus lye solution is not the time for maybe.
Match It to Your Workflow
- If you use a hand blender, taller sides help stop burping and splatter.
- If you whisk by hand, a wide base keeps the bowl from skating around.
Soap Craft Lab keeps a few no-drama bowl options on hand, because a solid mixing bowl quietly upgrades all your beginner soap making tools.
Long-Handled Spoons and Silicone Spatulas
Stirring tools are the underrated heroes in beginner soap making tools -- not glamorous, just reliable.
Reach and Safety
- A long-handled spoon: keep your knuckles away from fresh lye mixtures. Gives steadier control when your soap batter starts to thicken.
Cleanup and Waste Control
- A silicone spatula: handles scraping like a champ, especially around buckets and jugs. Being heatproof and flexible means it bends into corners without melting or snapping.
How to Keep Both Working Longer
- Use the long-handled spoon for the heavy mixing.
- Switch to the silicone spatula to clear sides and pour cleanly.
- Rinse right away so the stirring tool doesn't end up glued with dried batter.
Soap Craft Lab tends to pair a sturdy long-handled spoon with a quality silicone spatula, since these two stretch every batch further -- exactly what you want from beginner soap making tools.
Molding Tools
Getting the right molds can make or break your beginner soap making tools setup. Good molds keep shapes clean, edges sharp, and unmolding stress-free. If you're building your stash of soap-making tools for beginners, this is where things get practical and fun.
Silicone Loaf Molds
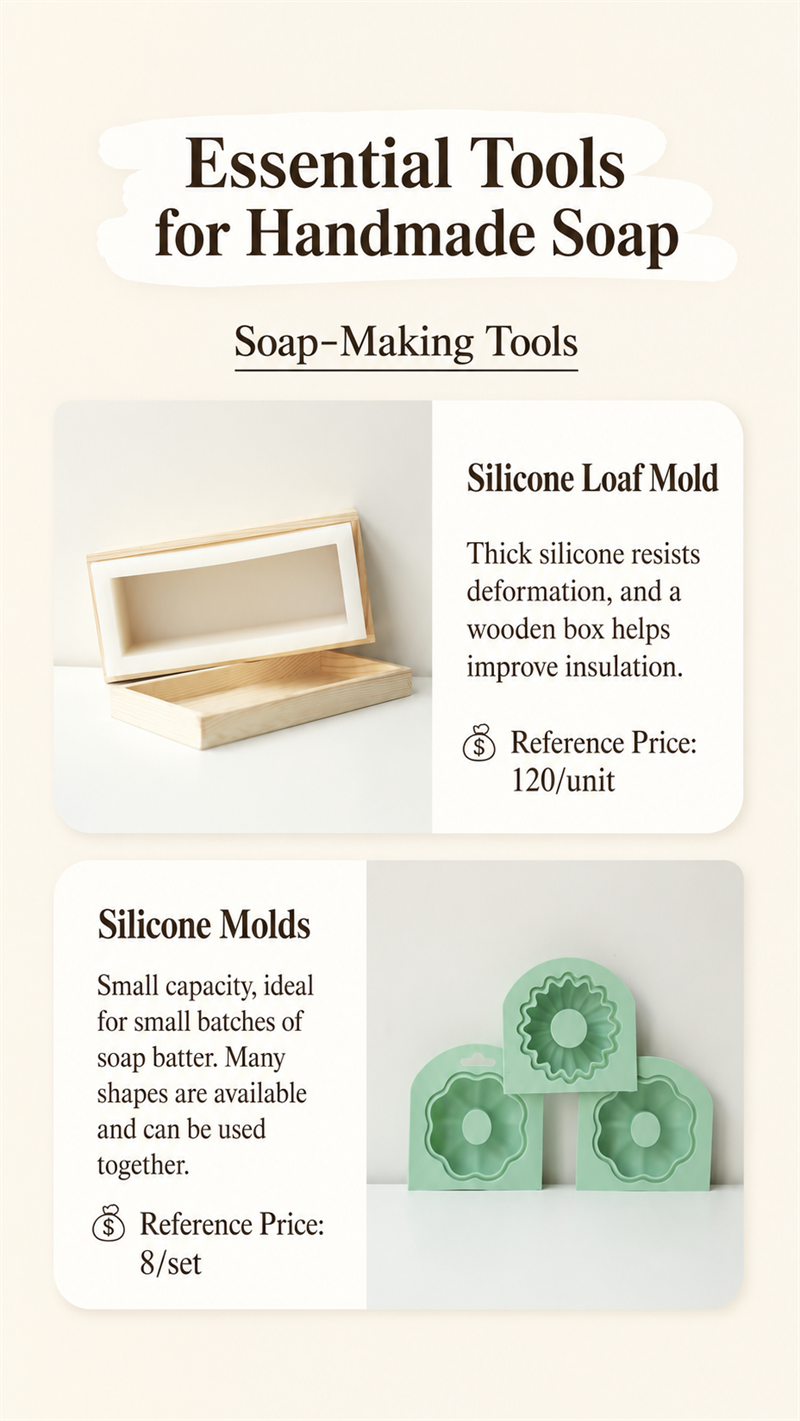
A silicone loaf mold is often the anchor of most beginner soap making tools collections.
Why It Works So Well
- Flexible structure allows easy unmolding without prying.
- Naturally nonstick surface reduces lining needs.
- Ideal for creating a uniform soap loaf you can slice cleanly.
Material Advantages
- Heat tolerance: handles most beginner soap-making temperatures.
- Durability: resists cracking compared to rigid plastic.
- Cleaning: quick rinse, mild soap, air dry.
Performance Comparison
| Feature | Silicone Loaf Mold | Plastic Mold | Wooden Mold |
|---|---|---|---|
| Flexibility | High | Low | None |
| Heat Retention | Moderate | Low | High |
| Lining Needed | Rarely | Sometimes | Always |
| Cleaning Effort | Easy | Easy | Moderate |
| Longevity (avg. years) | 3-5 | 2-3 | 5+ |
For DIY soap fans building reliable beginner soap tools, this mold keeps things simple. Soap Craft Lab often recommends it as the starting point in a balanced soap tools kit.
Crafting Shapes With Individual Silicone Molds
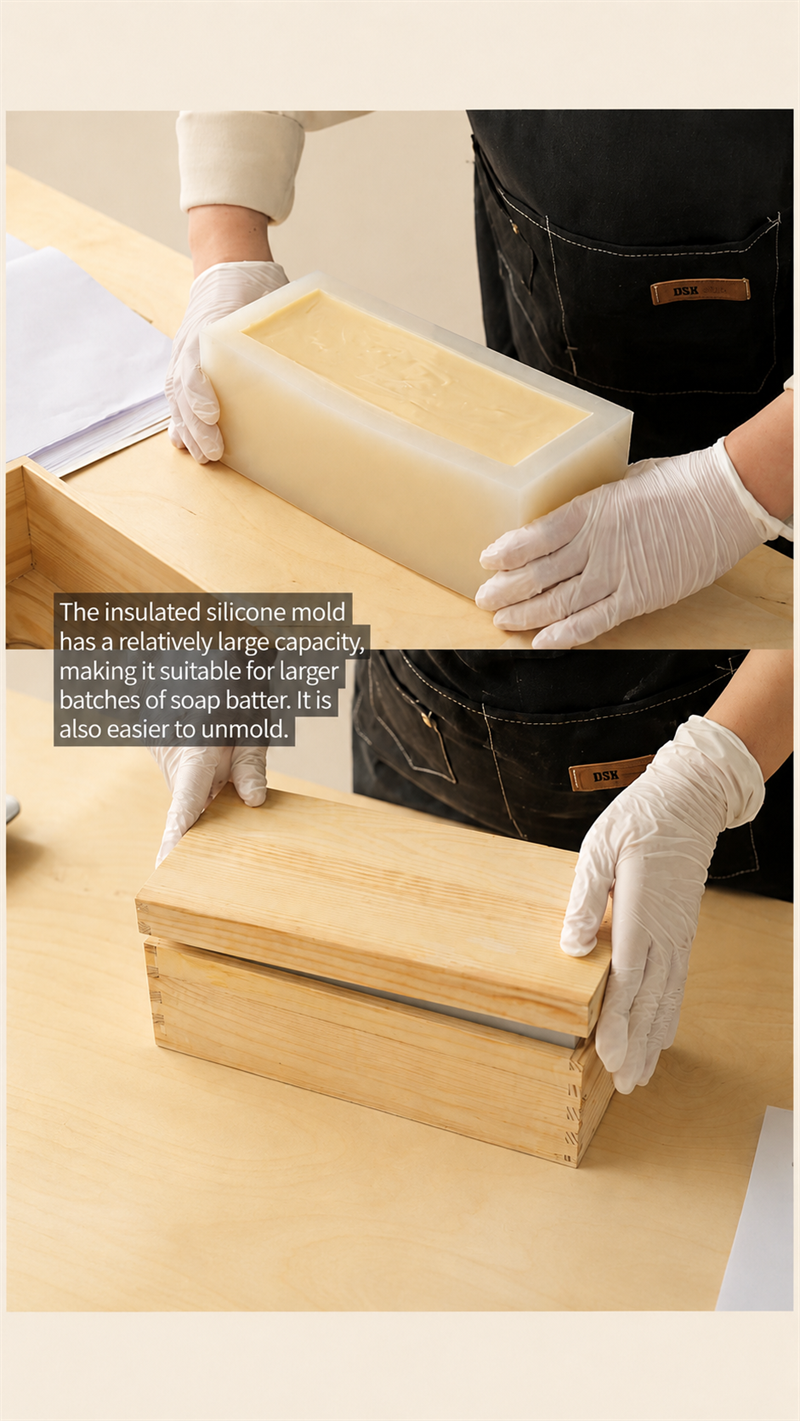
If creativity matters, individual silicone molds open the door to bold soap shapes and detailed decorative soap designs.
Best Uses and Design Perks
- Best uses: small batch soap experiments; seasonal gifts; testing fragrance blends.
- Design perks: intricate unique designs; no cutting required; easy release thanks to flexible silicone soap molds.
In 2025, Grand View Research noted that personalized home craft goods continue to rise in demand, with handmade bath products seeing steady growth.
Consumers are increasingly favoring small-batch, customized personal care products, reported Grand View Research (2025). That trend makes crafting molds a smart addition to any beginner soap making tools setup.
Wooden Soap Mold vs Plastic Soap Molds
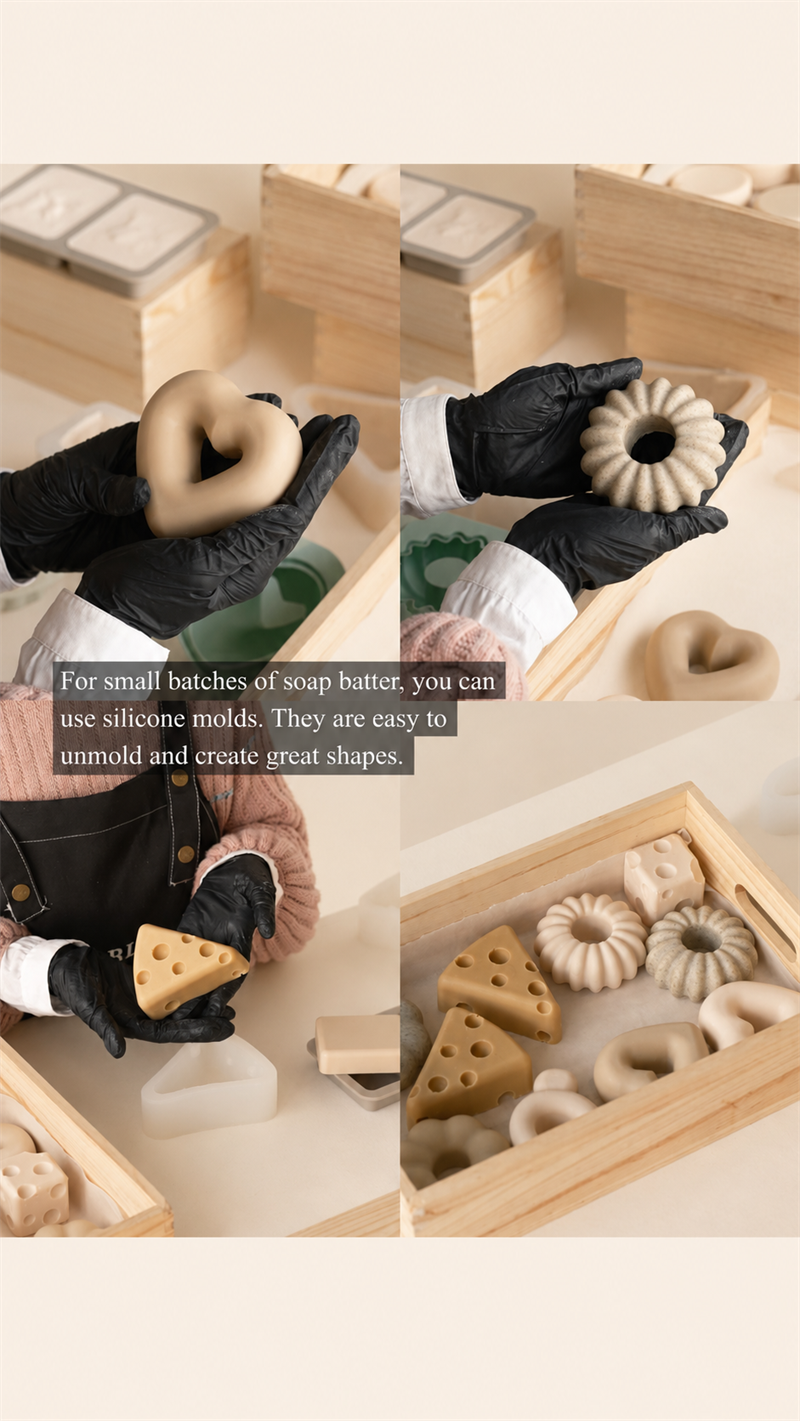
Choosing between a wooden soap mold and a plastic soap mold often comes down to heat control and workflow.
Wooden Mold
- Pros: retains heat, supports gel phase; strong long-term durability.
- Cons: requires lining; more cleanup steps.
Plastic Mold
- Pros: lightweight; budget-friendly.
- Cons: less insulation; can warp under high heat.
When comparing soap mold material options inside your beginner soap making tools, think about your recipe style and climate. Cooler rooms often benefit from wood. Warmer spaces? Plastic can do just fine.
Soap Craft Lab includes both options in curated soap-making tools for beginner kits, so makers can test what suits their flow.
Lining Paper Essentials for Easy Release
Rigid molds need support from parchment paper, wax paper, or a fitted mold liner. Skipping this step can mean torn edges and stuck soap.
Lining Sequence for Clean Cuts
- Measure interior dimensions of the mold.
- Cut parchment paper with extended side flaps.
- Fold crisp corners to prevent leaks.
- Press the liner flat to avoid air gaps.
- Pour soap and allow full set before lifting.
Benefits Stack Up Fast
- Prevent sticking during the soap-making process.
- Protect mold surfaces.
- Improve edge definition.
- Support consistent clean cuts.
A tidy liner setup turns basic beginner soap making tools into dependable equipment that works batch after batch.
Cutting and Finishing Tools
Getting clean bars is where a lot of beginner soap batches go sideways. This is a quick, practical run-through of beginner soap-making tools for cutting and tidying: what feels easiest, what stays safe, and how to get repeatable results without getting fussy.
Soap Cutter vs Sharp Kitchen Knife
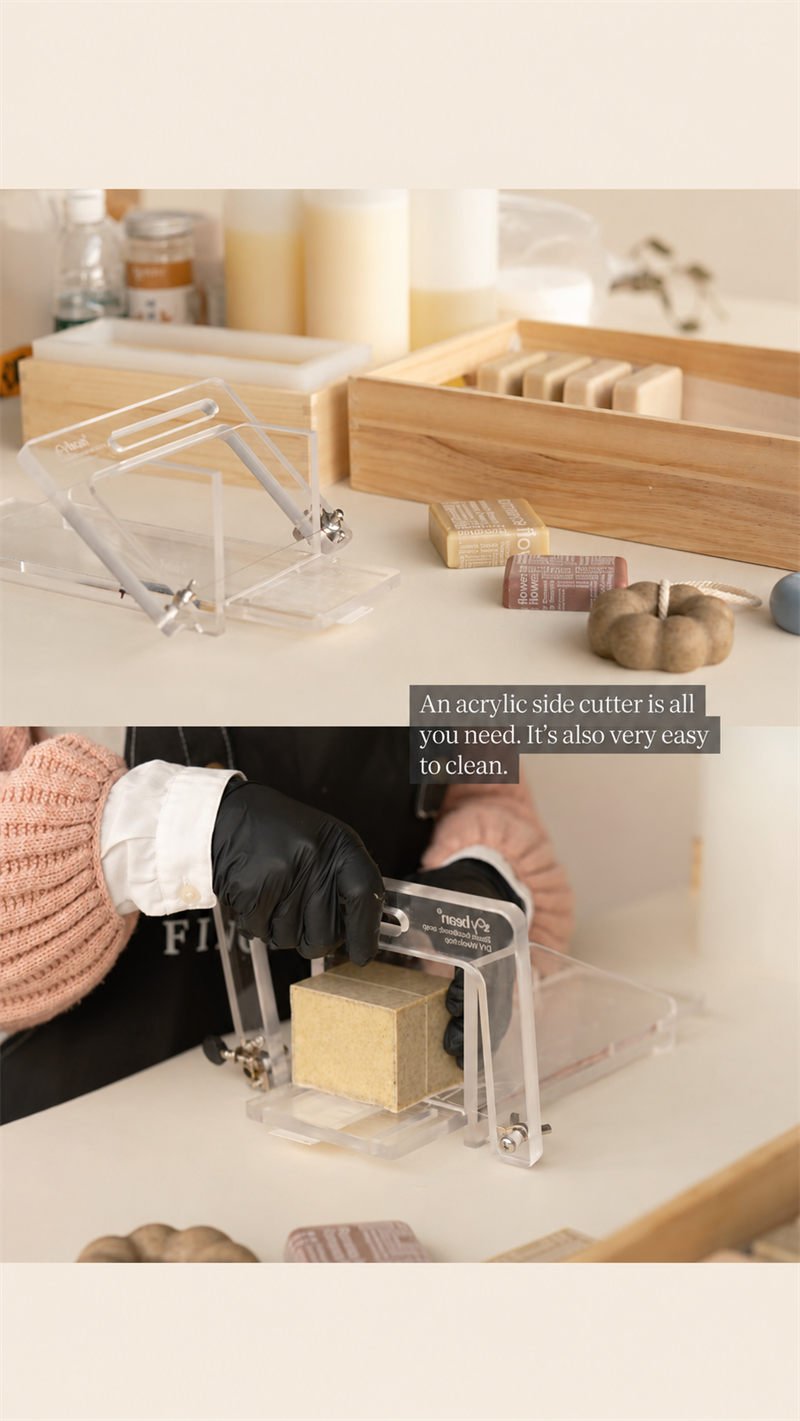
For beginner soap-making tools, the choice isn't fancy vs cheap; it's repeatability vs flexibility, with a little safety reality check.
Soap Cutter
- Setup and control: the fixed blade path helps precision, even when your wrists are tired. A stable handle (or press arm) keeps your cut straight without white-knuckle gripping.
- What it's best at: uniform bars fast; ease of use is the whole point when you're making more than a loaf or two.
- Watch-outs: keep hands out of the travel lane; just one quick slice is how nicks happen.
Kitchen Knife
- When it makes sense: small batches, test loaves, or when your beginner soap-making tools budget is tight.
- Technique notes: use a long, straight blade and commit to the cut; sawing makes drag marks. Check the handle comfort -- if it twists in your grip, your bars will show it.
Soap Craft Lab bundles simple guides with cutting gear so your good enough cut turns into a clean, sellable bar.
Get Precise Cuts With a Ruler and Cutting Board
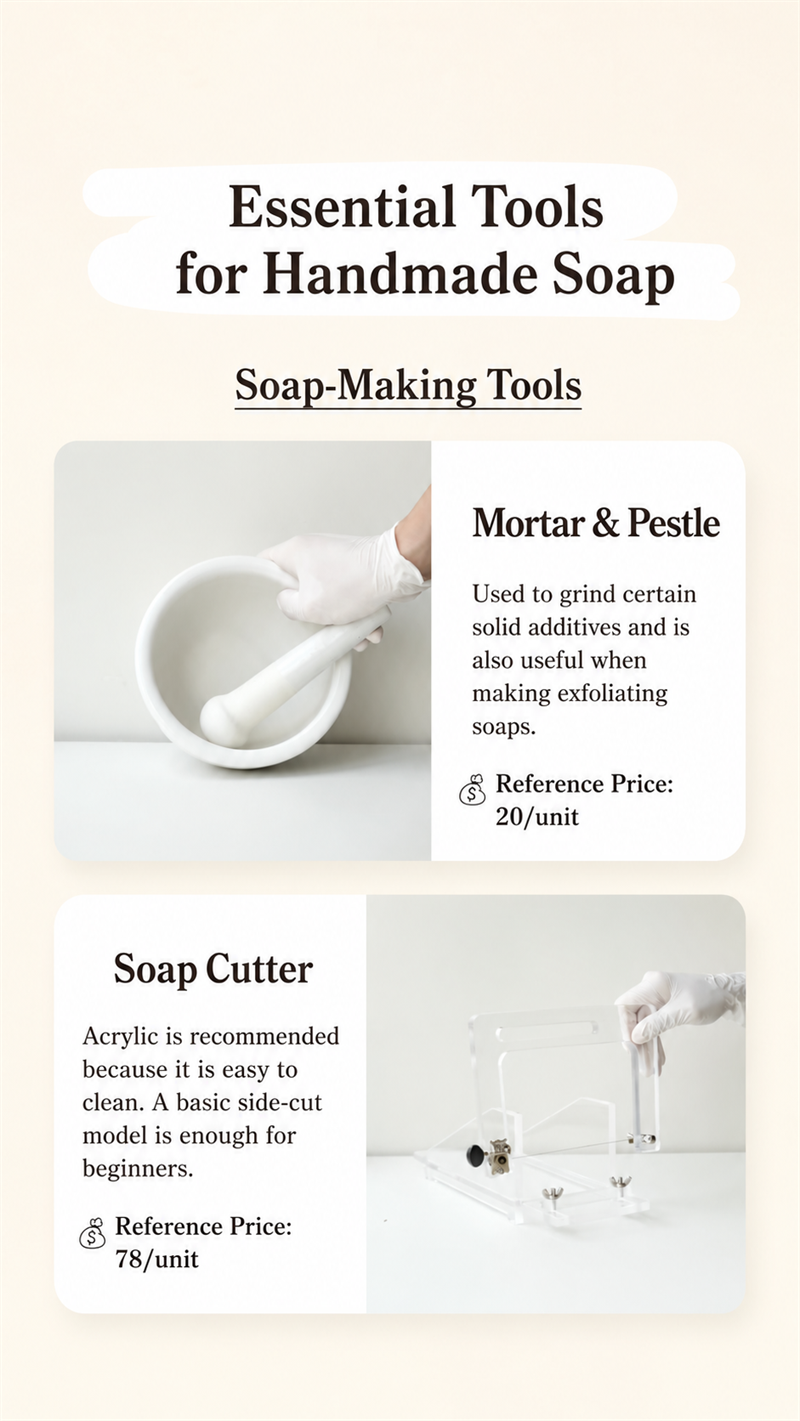
If you want same size every time without buying a dedicated rig, this is the most underrated part of beginner soap-making tools: a ruler and a solid cutting board on a truly level surface.
- Mark your loaf using a measurement plan: pick 1.0 inch, 1.25 inches, or 1.5 inches and stick to it for consistency.
- Lay a straight edge (your ruler) across the top as a visual guide.
- Cut straight down, then lift -- don't rock the knife unless you like slanted faces.
Bar Width Quick Reference
| Bar Width (in) | Bars per 10-inch Loaf | Typical Use |
|---|---|---|
| 1.00 | 10 | Guest, sampler |
| 1.25 | 8 | Standard everyday bar |
| 1.50 | 6 | Big block premium look |
Soap Craft Lab: If your board wobbles, your cuts wobble.
Paring Knife Techniques for Smooth Edges
Edge cleanup is where beginner soap-making tools start to feel like finishing tools, not just cutters.
Paring Knife Basics
- Use real sharpness; a dull tip tears and leaves chalky crumbs.
- Aim for a shallow angle so you shave, not chop.
Edge Refinement Flow
- Set light pressure and pull toward you in short strokes for a clean cut.
- Rotate the bar, repeat on all sides, then kiss the corners for a smooth finish.
- If one corner dips, stop; chasing it usually makes the bar lopsided.
Troubleshooting
- Ragged edge: reduce pressure, increase angle control.
- Flat spot: fewer passes, longer strokes, and commit to one line.
Curing and Storage Equipment
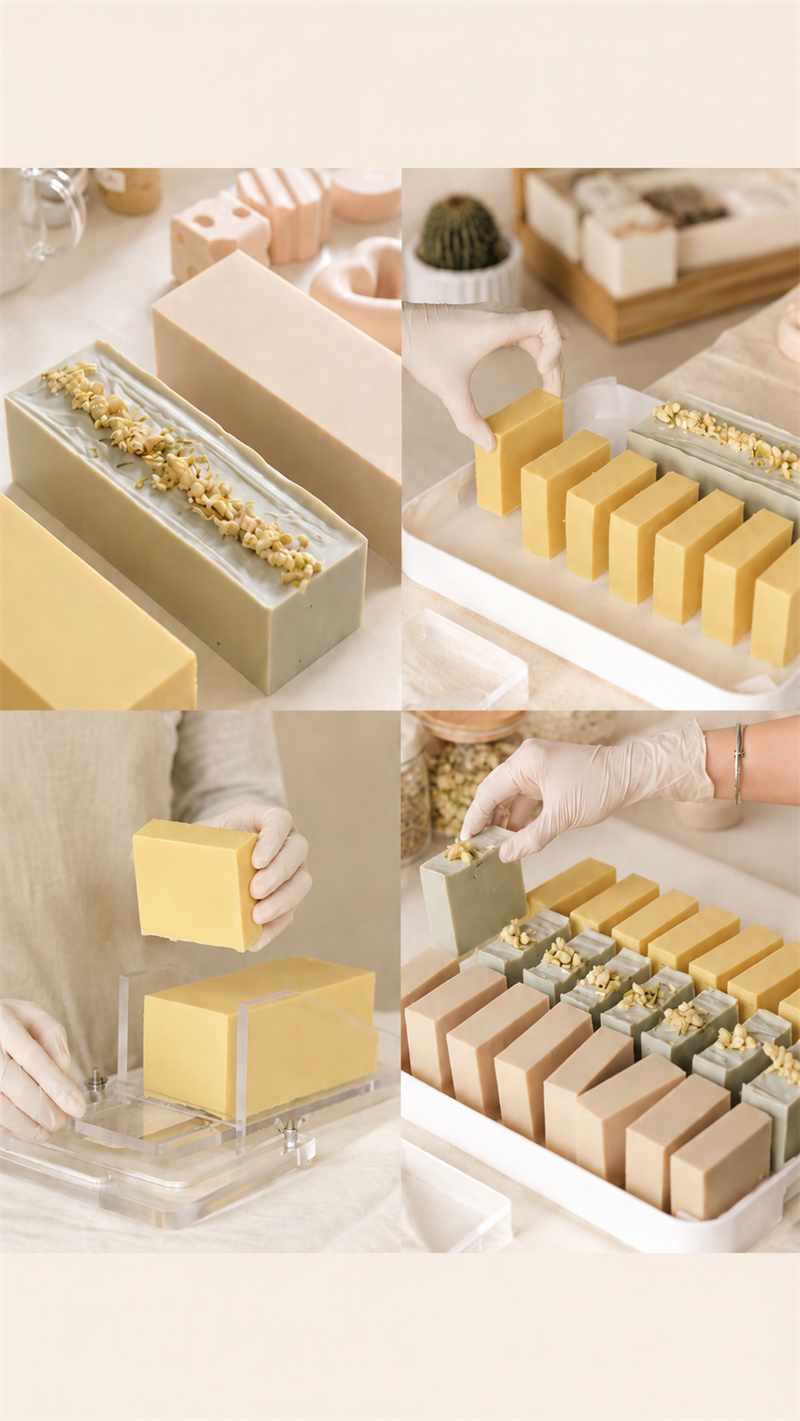
If your bars feel soft, sweaty, or kinda meh, it's usually not the recipe -- it's the cure. This setup talk is part of beginner soap making tools that actually changes results. You'll see how racks, airflow, mats, and boxes keep bars tidy, harder, and better smelling without eating up your shelf space.
Curing Rack: Your Drying Champion
A curing rack is the quiet hero of soap drying because it lifts soap bars so air can hit every side. That's how you get even drying, not a hard top with a squishy bottom.
Core and Space Wins
- Core win: air circulation around the full bar, not just the top.
- Space win: stacked levels save shelf space without cramming bars together.
Practical Setup
- Keep bars in rows with finger-width gaps so soap drying doesn't stall and edges don't stay tacky.
- Rotate on a schedule: week 1 flip every 2-3 days; weeks 2-4 flip weekly for even drying.
If you want a tidy, modular option, Soap Craft Lab sells racks that fit small rooms without turning your counter into chaos.
Ventilated Shelves and Fans
Sometimes yes, sometimes no; it depends on your room and your patience. For soap curing, ventilated shelves help more than people think, since stagnant air keeps moisture hanging around.
Quick Read on the Gear
- Drying fans: push air flow across bars for faster moisture removal.
- Humidity control: matters if your space sits muggy for days.
- Soap quality: improves when cure conditions stay steady.
When to Add a Fan
- Start simple: rack + open room air (beginner soap making tools don't need to be fancy).
- Add a fan only if you notice slow hardening or a damp feel.
- If you run a fan: point it past the soaps, not directly at them; aim for gentle air flow, not a wind tunnel.
Drying Mats vs Storage Boxes
This is where lots of beginner soap-making tools lists get messy. Drying mats and storage boxes do different jobs, and mixing them up can mess with cure time.
Use Them Like This
- During cure: pick drying mats with air permeability; use them as shelf liners to prevent sticking.
- After cure: move to storage boxes for soap storage; keep organized storage so scents don't mingle.
Storage Options Comparison
| Option | Air Contact (1-5) | Best Timing | Main Risk |
|---|---|---|---|
| Open drying mats | 5 | Weeks 1-6 | Dust exposure |
| Silicone mat | 2 | Short-term only | Can trap moisture |
| Cardboard shoe box | 1 | Fully cured only | Fragrance mixing, damp |
| Vented plastic bin | 3 | Fully cured + dry room | Odor carryover |
If beginner soap making tools shopping has you stuck, Soap Craft Lab also bundles mat-and-box combos so you're not guessing.
Maximizing Fragrance With Proper Air Circulation
Scent loss isn't always your oils -- it's often the cure environment. Fragrance retention improves when air circulation keeps surfaces dry, because trapped dampness can speed up fragrance fade during the soap curing process.
What Helps Most
- Air that moves: prevents wet pockets that dull scent preservation and can distort essential oils.
- Balanced air: too still = moisture lingers; too aggressive = top notes can flash off faster.
Simple Routine That Fits Budgets
- Cure on a rack, not flat counters.
- Keep bars spaced for optimal drying.
- Box only after the bars feel consistently hard and dry to the touch.
Preparation and Cleanup Accessories
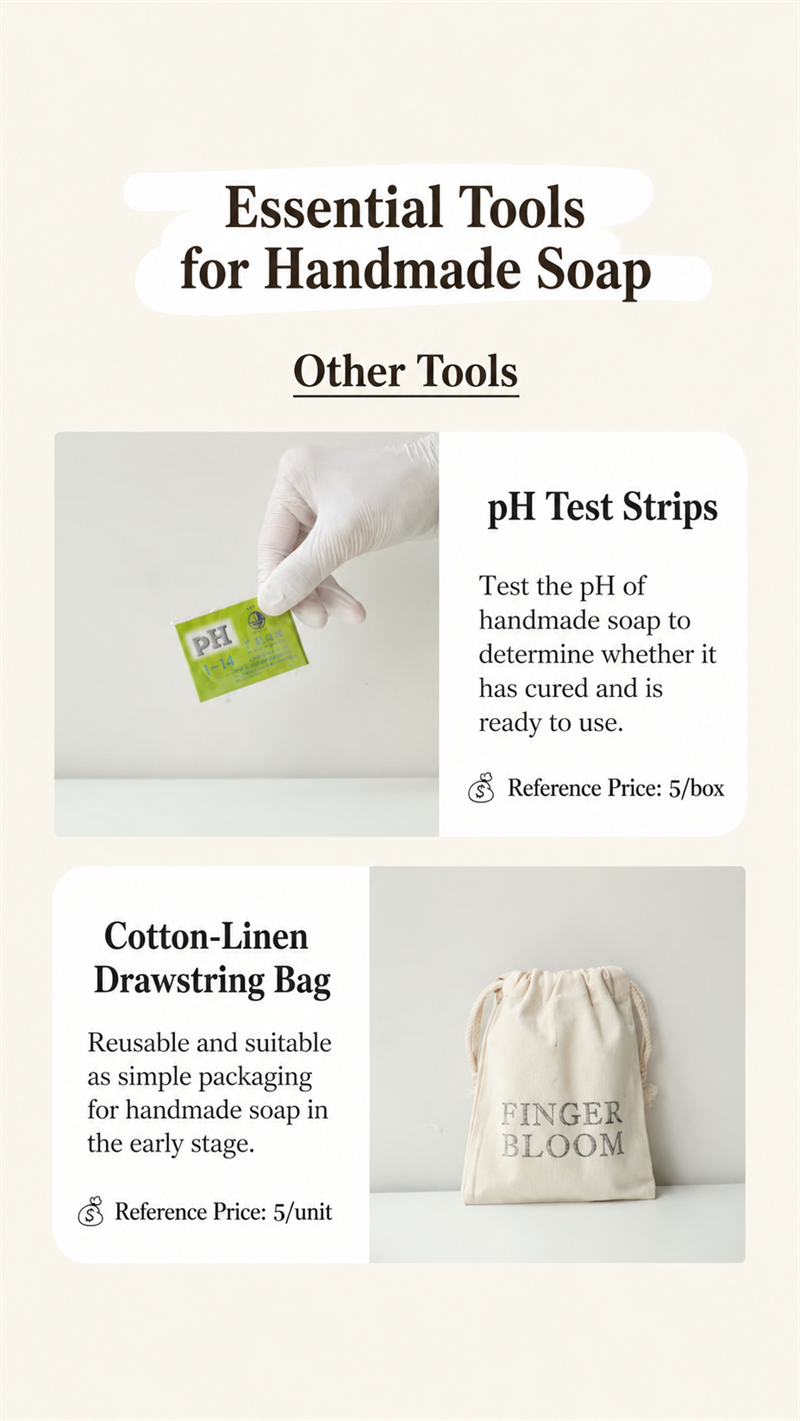
If your sink area turns into a sticky disaster, you're not doing it wrong -- you're just missing a few prep-and-clean helpers. These beginner soap-making tools keep your counters safer, your cleanup faster, and your leftovers from becoming mystery blobs. Soap Craft Lab keeps it simple: protect, wipe, store.
Protective Surface Covers
Protecting your workspace is one of those beginner soap-making tools moves that saves you from scrubbing for an hour later. Lye splashes and raw soap batter don't play nice with countertops, so lay down a barrier before you even measure water.
Quick Cover Picks
- For everyday: silicone mat, craft paper, newspaper.
- For bigger pours or clumsy days: plastic sheeting or an old tablecloth.
A decent routine: clear the area, cover it edge-to-edge, then tape corners if you're using paper so it doesn't slide when you set down a pitcher. Keep one soap-only cover option in your kit; it's a small upgrade that makes beginner soap-making tools feel less chaotic and more controlled. Soap Craft Lab fans usually keep a silicone mat as the everyday default because it wipes clean instead of soaking stuff up.
Quick Cleanup With Paper Towels and Cleaning Brushes
Cleanup speed matters because once soap sets, it turns into a crusty film. These beginner soap-making tools are the difference between a quick rinse and a stubborn scrub session.
Right After Pouring
- Grab paper towels for drips on the counter and scale.
- Use a damp microfiber cloth to catch the oily smear paper misses.
Tools Before They Harden
- Hit spatulas and bowls with cleaning brushes or scrub brushes.
- Finish with sponges for the last slick layer.
Cleanup Supplies Quick Reference
| Item | Typical Usage per Batch | Main Job |
|---|---|---|
| Paper towels | 6-12 sheets | Fast soak-up on fresh spills |
| Microfiber cloths | 2-3 minutes | Picks up residue without shredding |
| Cleaning brushes | 3-5 minutes | Scrubs grooves, handles, and pitchers |
If you're building a soap tools stash on a budget, start with paper towels and one tough cleaning brush option, then add nicer cloths later. Beginner soap-making tools don't need to be fancy; they need to be ready.
Organizing Leftovers in Containers
Leftovers happen -- extra colorant, unused fragrance, a bit of batter you didn't expect. Treat storage like part of your beginner soap-making tools setup, not an afterthought, and your next batch gets easier.
Storage Flow for Leftovers
- For wet or messy leftovers: stash in plastic containers or reusable containers, and label fast.
- For anything scent-sensitive: choose airtight containers so your supplies don't smell like last week's peppermint experiment.
- For mold warmth and drips: layer old towels under and over molds; it insulates and catches the sneaky leaks.
A simple flow that feels natural: scoop leftovers into plastic containers, snap the lid, then slide everything into storage bins so it's not roaming your kitchen like clutter. Soap Craft Lab kits pair nicely with this kind of low-stress storage, since you can keep all your beginner soap-making tools in one grab-and-go spot.
Key Points Before Making Soap
- →Safety gear (goggles, gloves, apron, mask, ventilation) is non-negotiable -- lye is caustic and demands respect.
- →A digital scale is the single most important measuring tool; volume measurements lead to failed batches.
- →A stick blender gets you to trace reliably; a whisk gives you slow control for delicate designs.
- →Silicone loaf molds are the best starting point for beginners -- flexible, nonstick, and easy to clean.
- →Curing racks with good airflow make the difference between soft, mushy bars and hard, long-lasting ones.