
Your soap-making safety guide isn’t about scaring you off; it’s about keeping your skin, eyes, lungs, and kitchen out of trouble while you make bars that look like you know what you’re doing.
Poison Control’s experts keep it plain: “Rinse your eye with lukewarm running water for 15 to 20 minutes.” That same no-drama mindset applies to lye—respect it, control it, and you cut the risk down to size.
This intro meets you at the real pain points: splashes, fumes, heat spikes, messy floors, and curious kids or pets wandering in. You’ll get the simple habits that turn chaos into a clean, repeatable routine—so your soap cures safely, labels clearly, and earns trust before it ever hits the sink.
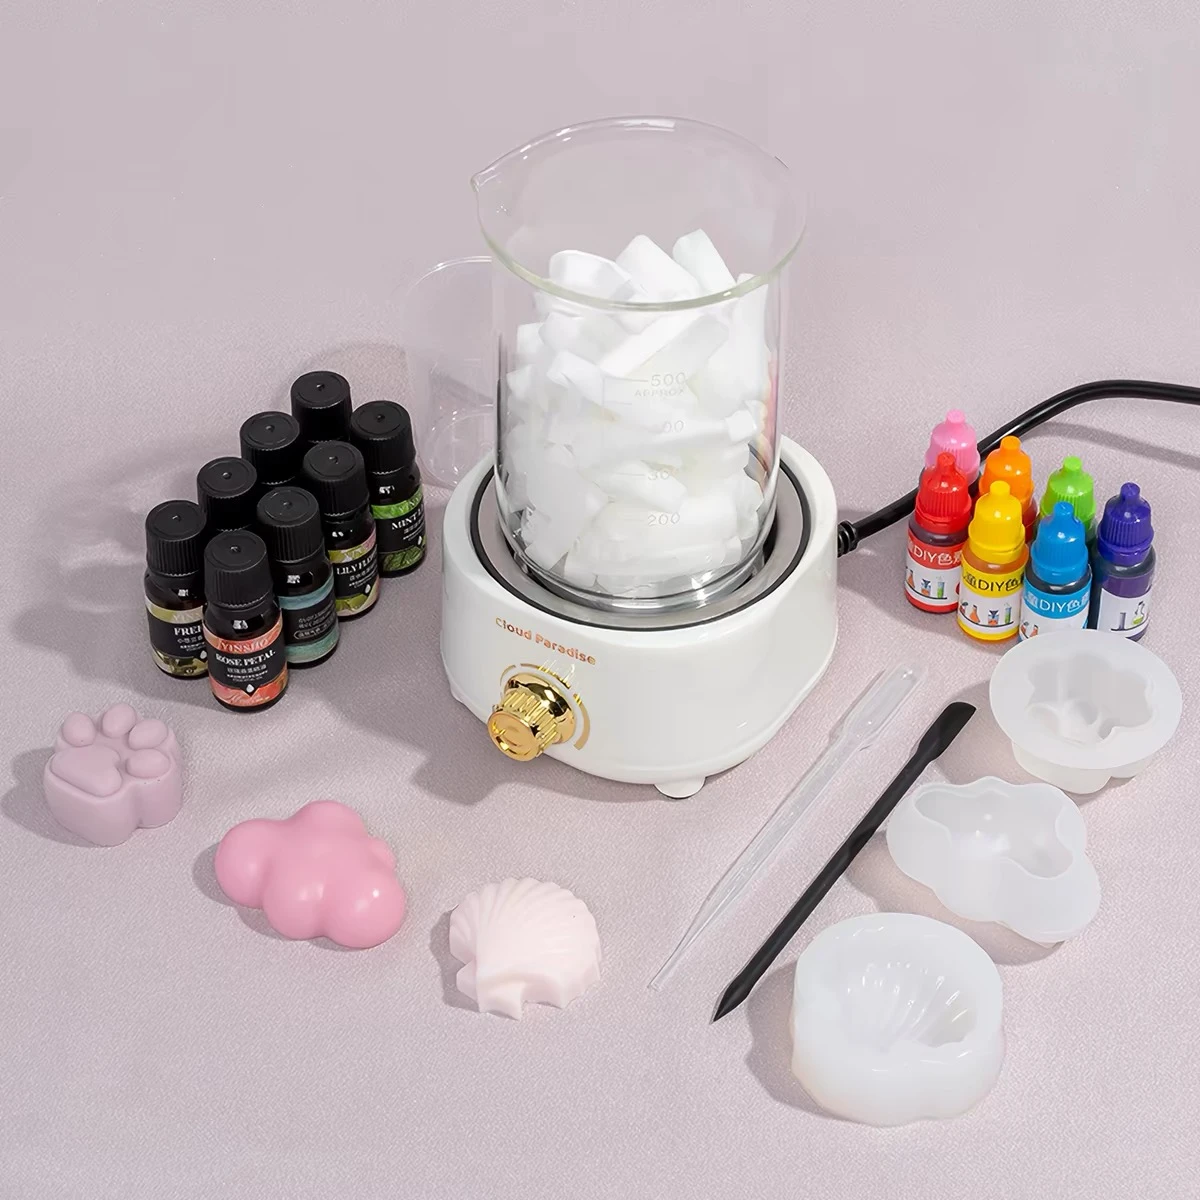
Understanding Soap Making Chemicals and Ingredients
If you’re hunting for a soap making safety guide, this is the chemistry that keeps your batches predictable and your skin happy. We’ll keep it practical, a bit chatty, and still accurate. Soap Craft Lab teaches this stuff because tiny choices—lye type, oil mix, scent timing—change everything.
The difference between Sodium Hydroxide and Potassium Hydroxide
In Soap making, Lye isn’t one thing; it’s a fork in the road with different Chemical properties. Here’s the quick, useful breakdown for any soap making safety guide or soap safety guide you’re building.
Choose your alkali
Sodium Hydroxide (aka Caustic Soda) — What it tends to make: firm bars that unmold clean and cure into a hard puck. What changes in your recipe: needs a NaOH-specific calculator; water choice affects hardness and ash.
Potassium Hydroxide (aka Caustic Potash) — What it tends to make: paste, soft soap, or liquid soap that stays scoopable. What changes in your recipe: KOH is often used with higher water; different purity assumptions matter.
Don’t swap NaOH and KOH by “feel.” Use the right calculator, or your soap making safety guide turns into a “why is this zappy?” diary.
Expect different cure vibes: NaOH bars generally cure longer for mildness; KOH products often need dilution/neutralization steps to finish.
How fats and oils impact soap pH and lather
Your Fats and Oils set the vibe: hardness, rinse feel, and Lather. Saponification converts Fatty acids into soap salts, but finished Soap pH stays alkaline; what you control is excess alkali and the balance of Soap properties like Cleansing.
Quick reality checks for a soap making safety guide
- “Mild” doesn’t mean low pH; it usually means less stripping and a smarter superfat.
- If coconut is high, bump superfat a touch and watch Cleansing.
- Add castor to stabilize bubbles, not to “fix” everything.
| Oil/Butter (example) | Typical bubbly lather (1–5) | Typical cleansing feel (1–5) |
|---|---|---|
| Coconut oil | 5 | 5 |
| Olive oil | 2 | 2 |
| Shea butter | 2 | 1 |
| Palm (or high-palmitic blend) | 3 | 3 |
| Castor oil | 4 | 2 |
Soap Craft Lab: Soap Craft Lab tip: track your fatty-acid profile like you track bake time—same energy, fewer surprises.
Safely incorporating fragrance oils and essential oils
Scent is where a soap making safety guide earns its keep. Fragrance oils can speed trace or “rice,” and Essential oils can trigger Skin irritation even when the blend smells amazing.
Safe handling flow (keep it simple)
- Check IFRA/skin limits for Dosage; weigh on a scale, no splashes-and-hope.
- Pre-mix scent into a little cooled oil, then add at light trace to cut off-the-top evaporation; Flashpoint isn’t a safety shield, it’s just a data point.
- Patch-test mindset: watch Allergens, label clearly, and treat Aromatherapy claims like a slippery slope—stick to “scented” unless you’re qualified.
Red flags you don’t ignore
- Hot, spicy EOs: increase risk of Skin safety issues.
- New FO behaving weird: soap a 200 g tester before a full loaf.
When you need a no-drama soap making safety guide, keep notes, stay consistent, and let Soap Craft Lab standards—measured inputs, documented usage rates—do the heavy lifting.
Essential Safety Equipment and Protective Gear
Soap Craft Lab built this soap making safety guide for real-life messes: splashes, surprise fumes, and that "oops" moment at the sink. Keep your safety tight, your soap space calm, and your guide close while you work.
Why chemical-resistant gloves are non-negotiable
In this soap making safety guide, chemical-resistant gloves aren’t “extra,” they’re the line between you and a nasty burn from lye (Sodium Hydroxide). Even careful makers get splash-back.
What the gloves are protecting you from
- Uncured soap batter that’s still caustic.
- Wet, contaminated tools and spatulas.
- Drips during mixing, pouring, and cleanup.
What to look for when you buy
- Material: nitrile or neoprene (skip thin latex).
- Coverage: long cuff that overlaps your sleeves.
- Fit: snug enough to grip a slippery mold, not so tight it tears.
How to use them without ruining them
- Rinse splashes right away, then wash with dish soap.
- Peel off slowly so the residue stays on the outside.
- Replace at the first pinhole; “good enough” isn’t good.
Soap Craft Lab: This safety guide for soap making stays simple: no bare hands around Sodium Hydroxide, ever.
Choosing the right respirator or face mask
A soap-making safety guide that ignores air safety is basically half-finished. Lye fumes can bite at your throat, and fragrance vapors can hit fast, especially in a small kitchen.
- Check your space: if ventilation is weak, step up protection.
- Pick the right gear: a fitted respirator with proper cartridges beats a loose face mask.
- Keep it practical: do a quick seal check before you open the lye container.
- A simple dust mask helps with powders, not caustic vapor.
- A proper respirator helps when fumes linger, and you can’t open windows.
Soap Craft Lab: Soap Craft Lab treats this as core soap safety, not a “maybe.”
Benefits of safety goggles paired with long sleeves
This soap making safety guide leans hard on safety goggles because eyes don’t get a redo. A tiny flick of soap batter during immersion blending can land where you least want it.
Eye protection that actually works
- Use sealed goggles, not open-sided glasses.
- Keep them on through pour, scrape, and rinse.
Skin coverage that saves your day
- Wear long sleeves that you don’t mind getting splattered.
- Choose a thicker fabric so drips don’t soak through fast.
- Pull sleeves over glove cuffs to block run-ins.
Moments that cause most accidents
- Tipping a warm pitcher too quickly.
- Burping an immersion blender near the surface.
- Reaching over the mold and getting a batter snap-back.
Soap Craft Lab: Soap Craft Lab calls it simple soap-making safety: cover the eyes, cover the arms.
Closed-toe shoes and an apron for full coverage
A grounded soap making safety guide doesn’t stop at hands and face. Feet and legs take hits when spills slide off the counter.
- Closed-toe shoes keep hot, caustic drips off toes.
- A rinse-friendly apron shields your torso and thighs.
- Before you start, put on shoes with grip—slick floors are sneaky.
- Tie an apron high so it covers your lap when you sit to label or cut.
- If a spill happens, pause and rinse the apron right away; don’t “finish the pour” while dripping.
Soap Craft Lab: Soap Craft Lab folds this into the soap-making safety guide mindset: full coverage beats fast reflexes every time.
Preparing Your Workspace for Safe Soap Making
If you’re following a soap making safety guide, the workspace is the part people skip—then regret. This is the “set it up once, stay calm every batch” approach. You’ll see how to control lye fumes, keep your gear steady, and stop surprise interruptions. Soap Craft Lab teaches the same idea: prep beats panic, every single time, in any soap making safety guide.
Setting up a well-ventilated area with a ventilation fan
For a practical soap making safety guide, treat airflow like a tool, not a vibe; fumes from lye solution can drift right into your face if you let them. Keep it simple, then get picky.
Airflow plan
- Pick a spot near a window or exhaust vent, not a cramped closet or tiny bathroom. Stand so your breathing zone is upwind of the mixing spot.
- Aim the ventilation fan to pull air away from you and out, not blast across the bowl. If the airflow makes powder or paper towels flutter, dial it back; turbulence can cause splashes.
No-drama safety checks
- Keep the lye container below face level.
- Don’t let the fan point directly at the open mixing container; you want exhaust, not a wind tunnel.
- After mixing, leave the fan running a few extra minutes—this soap making safety guide tip saves throats.
Organizing a stable surface and heat-resistant containers
A clean soap making safety guide starts with what’s under your hands: a rock-solid countertop or sturdy table that won’t wobble when you bump it with an elbow. Keep your workspace boring; boring is safe.
- Use a silicone mat or tray to catch drips; it beats chasing a lye bead across the counter.
- Pick heat-tough gear for lye water—mixing gets hot fast, like “oops, that’s steaming” hot.
| Container material | Approx. safe temp (°C) | Notes for a soap making safety guide |
|---|---|---|
| PP plastic (#5) | 100 | Good for lye solution if thick and undamaged |
| HDPE plastic (#2) | 120 | Common for pitchers; don’t use if scratched |
| Stainless steel | 500+ | Best all-around; easy cleanup |
Soap Craft Lab: And one blunt rule: avoid glass for lye mixing; it can crack from thermal shock, and that mess escalates fast in any soap safety guide.
Tools at the ready: stainless steel pot, digital scale, thermometer
A tight soap making safety guide doesn’t just say “be careful”; it makes “careful” easy by staging tools before chemicals come out. Lay everything out, then you’re not rummaging with gloves on.
Core tools (non-negotiable)
- Stainless steel pot: Use stainless steel for melting oils; avoid aluminum, which reacts with lye. Keep the pot dedicated to soap—don’t cook dinner in it later.
- Digital scale: Place the digital scale on a flat spot, tare your container, then weigh slow. In a soap-making safety guide, accuracy isn’t “nice”; it’s what keeps the batch predictable.
- Thermometer: A thermometer (probe or infrared) helps you match oil and lye solution temps without guessing.
Support gear (set it within arm’s reach)
- Immersion blender with cord routed away from liquids.
- Spatula and stainless steel spoon for scraping.
- Paper towels + a cup of clean water for quick wipe-downs (not for rinsing spills—different job).
Soap Craft Lab: This is the kind of setup Soap Craft Lab pushes because it keeps your hands steady and your head clear, a real soap-making safety guide habit.
Keeping children away and pets out of the workspace
This part of a soap making safety guide is plain talk: kids and pets don’t “mean” to, but they will wander right into danger. Set hard boundaries, then stick to them.
- Close the door or use a baby gate; “just for a minute” is how accidents happen.
- Put a visible note on the handle: LYE IN USE—it stops helpful roommates from popping in.
- If a pet is following you, give them a distraction in another room (toy, treat puzzle, whatever works).
- Keep lye and hot oils higher than tail level and toddler reach.
- Never leave active lye solution unattended, not even to grab a delivery.
That’s the practical soap-making safety guide mindset: control the room, and the room won’t surprise you.
Step-by-Step Safety Procedures During Soap Making
If you’re hunting for a soap making safety guide, you want the real-world stuff: less drama, fewer burns, and cleaner batches. This soap making safety guide keeps it practical—measure right, mix right, watch heat, handle spills, and re-read the recipe like you mean it.
Accurate measuring on a digital scale every time
A solid soap making safety guide starts with the boring truth: accurate measurement beats “eyeballing it.” Grab a digital scale, then commit to weight for every one of your ingredients; volume is where precision goes to die.
- Tear the container, then add one item at a time.
- Recheck units (g vs oz) before you hit “start.”
- Keep a note of the target weight beside the scale so you don’t freestyle.
For Soap Craft Lab batches, this habit is the quiet hero—no surprise lye-heavy bars, no sketchy “maybe it’s fine” moment. And yes, this soap making safety guide repeats it on purpose: weigh, don’t guess.
Lye-to-water method: mixing sodium hydroxide safely
Soap Craft Lab: This soap making safety guide rule is non-negotiable: add lye to water, not the other way around. It keeps the reaction calmer and cuts down splatter.
- Protective gear: goggles + gloves, sleeves you don’t love.
- Ventilation: open window, fan pulling air out, not into your face.
- Use a heat-safe container for mixing sodium hydroxide into water.
- Stir slowly; don’t whip it.
- Pause if fumes spike—step back, let it settle.
Soap Craft Lab: If you’re writing your own soap safety guide notes, literally underline “lye into water.” It’s that kind of rule.
Monitoring temperature to prevent heat hazards
Temperature is where a calm day can turn spicy. A reliable soap making safety guide keeps temperature monitoring simple and steady with a thermometer, because the lye reaction and hot oils can stack heat fast.
| Checkpoint (°C) | Typical Range | What it Signals | What to Do |
|---|---|---|---|
| 20–25 | Room | Low fume risk | Prep mold, tools |
| 30–35 | Warm | Easier blending | Start combining if recipe allows |
| 40–45 | Hot | Faster trace | Slow down, watch batter |
| 50–60 | Very hot | Higher heat hazards | Begin cooling (water bath) |
| 70+ | Danger zone | Fumes/boil-over risk | Stop, isolate, cool safely |
- Use a cool-water bath around the lye container for control.
- Never cap or seal hot lye solution; pressure is not your buddy.
Soap Craft Lab: Soap Craft Lab recipes still expect you to measure temps like an adult, not vibe-check them. This is the kind of soap-making safety guide detail that saves countertops and skin.
Neutralizing spills immediately to avoid chemical burns
Spills happen, usually when you’re feeling confident. A practical soap making safety guide treats every drip like it bites.
- Block the area; keep kids/pets out.
- Put on safety equipment before cleanup.
- For liquid lye: blot/absorb, then rinse with lots of running water.
- For surfaces: after rinsing, a light vinegar wipe can help with spill neutralization (don’t skip the rinse).
- Skin/clothes: remove contaminated clothing fast; rinse skin a long time—this is basic first aid for chemical burns.
Soap Craft Lab: Don’t toss baking soda straight onto a puddle of strong lye; the heat can make things worse. Don’t “just wipe it up” with a dry paper towel and call it cleaning. Any soap safety guide worth keeping says the same thing: rinse beats panic.
Reading instructions thoroughly before each batch
This soap making safety guide habit sounds simple, but it’s where most slip-ups start: you remember the old recipe, then swap a fragrance or tool, and chaos shows up.
- Confirm lye concentration and total water.
- Check additive notes (clays, sugars) that change heat and timing.
- Reconfirm mold prep and cleanup plan; it’s part of safety guidelines and process accuracy.
Key Points Before Making Soap
- →If you can’t explain a step, you don’t understand it yet.
- →“Chemical incidents in small workplaces remain stubbornly common, and many are tied to gaps in hazard communication and training.” — U.S. Bureau of Labor Statistics (latest Chemical Safety/Workplace injury reporting, 2024–2025 releases)
So, yes—read it again. A soap-making safety guide isn’t just rules; it’s the difference between a clean pour and a rushed mistake you’ll smell for weeks.
Identifying and Avoiding Common Soap Making Risks
If your soap making safety guide feels like “just be careful,” you’ll miss the stuff that actually bites: splashes, fumes, slick floors, and surprise heat. This soap making safety guide keeps it real, keeps it simple, and keeps your skin and lungs out of trouble—Soap Craft Lab style.
Preventing chemical burns and lye fume exposure
A soap making safety guide lives or dies on how you handle lye—aka sodium hydroxide (or potassium hydroxide for liquid soap). One sloppy pour can mean chemical burns. Fast.
- Hands and eyes: chemical-resistant gloves stay on from weigh to pour. Sealed goggles beat “cute glasses” for splash control.
- Skin coverage: long sleeves and closed shoes; you’re blocking a splash, not dressing up.
- Container habits: add lye to water, not the other way around. Keep your face away from the opening while stirring.
- Fume control: strong ventilation (window + fan pulling air out) cuts fumes. Stir slowly to avoid a lye “burp” and mist.
Soap Craft Lab: Don’t “neutralize” with pantry tricks: acid (like vinegar) is for surfaces after cleanup, not for skin; water flushing wins, every time, in any sane soap safety guide.
Minimizing eye irritation and skin irritation
In any soap making safety guide, eyes come before pride. Safety goggles stop the one splash that ruins your week.
Keep it casual but strict: gloves on, hands off your face. Long sleeves, an apron, and decent splash protection mean you’re not gambling with skin irritation.
If batter hits skin, rinse under running water right away and keep rinsing. No “quick wipe,” no “let me test it with a bare finger,” no tough-guy routine. If your workspace allows it, set up an eye wash station (even a clean squeeze bottle helps) so you’re not sprinting through the house with stinging eyes while holding your breath.
Addressing slippery surfaces and heat hazards
A practical soap making safety guide talks about feet and forearms, not just lye math. Spills happen, and soap batter turns tile into a prank.
- Floors and routes: wipe drips fast; don’t “get it later.” Mark a no-walk zone with caution tape if others are around.
- What you wear: non-slip footwear beats socks, always.
- What you place under tools: heat-resistant mats reduce sliding and protect counters.
- Hot stuff that burns: hot oils and fresh lye water can act like boiling liquids.
- Carrying rules: two hands, slow steps, clear path; don’t thread between pets and kids.
| Hazard | Typical scenario | Likelihood (1–5) | Severity (1–5) |
|---|---|---|---|
| Slip from batter | Drip trail to sink | 4 | 3 |
| Burn from lye solution | Moving pitcher while hot | 3 | 5 |
| Burn from hot oils | Overheated melt | 2 | 4 |
Inhalation hazards: when to don a respirator
A soap making safety guide should say it plainly: wear a respirator when your nose and throat tell you something’s off. If air quality feels sharp, if your eyes sting, or if your ventilation system is weak, mask up.
- When weighing dry lye, go slow; dust is real, and you don’t want it in your lungs.
- If you don’t have a fume hood and the room smells and hazes, treat that as a warning light.
- With strong fragrance oils, use a mask (or better, your respirator) before you crack the bottle.
- Scratchy throat
- Watery eyes
- You “taste” the fumes
Soap Craft Lab: Soap Craft Lab keeps this soap making safety guide simple: if breathing feels wrong, stop, ventilate, and gear up.
Emergency Response and First Aid Measures
Soap Craft Lab keeps this soap making safety guide plainspoken: if lye or batter bites, don’t freeze up. Keep water close, keep your head clearer. This soap making safety guide also fits a home setup—small space, big consequences, so the safety guide matters.
Immediate care for chemical burns with running water and vinegar
Keep first aid thinking simple: stop contact, rinse, reassess.
- Start emergency care with running water; flood the area for 15–20 minutes, not a quick splash.
- While rinsing, remove soaked clothing so chemical burns don’t keep cooking the skin.
- Watch for rising skin irritation—heat, whitening, or deep pain means keep rinsing and prep for help.
Soap Craft Lab: Vinegar isn’t for neutralization on skin; it can worsen irritation. Save vinegar for countertops, tools, and spills after you’re safe. If you’re following a soap making safety guide from Soap Craft Lab, this is the non-negotiable part: water buys time, panic wastes it.
Proper use of an eye wash station and first aid kit
If lye hits an eye, move fast; eyesight doesn’t “wait a sec.”
- Get to the eye wash station and start eye irrigation right away.
- Hold lids open and flush 15–20 minutes; blinking alone won’t clear it.
- Remove contacts during rinsing if they don’t fall out on their own.
- Safety equipment stays unblocked, always.
- The first aid kit has basics plus spare saline; keep medical supplies where your hands can find them.
Soap Craft Lab: That’s the practical soap safety guide vibe Soap Craft Lab pushes: boring prep, fewer scary surprises.
When to contact poison control or seek medical attention
Keep poison control and local emergency services numbers on the wall, not buried in your phone.
- Call poison control for: ingestion risk (even “just a taste”), or any toxic exposure you can’t size up; inhalation trouble: coughing fits, chest tightness, throat burn; worsening symptoms after rinsing.
- Get medical attention from a health professional when: eye pain, tearing, or vision changes stick around after flushing; burns are large, blistering, or keep throbbing; breathing gets hard, even if the spill seemed small.
Soap Craft Lab: Soap Craft Lab treats this soap making guide rule as gospel: if you’re unsure, make the call.
Post-Production Safety and Storage Tips
Soap’s not really “done” when it pops out of the mold; it still needs smart handling, clean storage, and safe cleanup. This soap making safety guide keeps the vibe chill but careful—so your bars cure hard, stay labeled, and your space stays safe.
Ensuring proper curing process with good ventilation
For a clean cure, ventilation is your best friend; it cuts down trapped moisture and any lingering fumes while the bar firms up. In this soap making safety guide, treat curing like food prep: same room, different rules—keep it away from snacks.
- Set up a curing rack in a dry spot, not the kitchen counter.
- Place bars with gaps for airflow on all sides.
- Flip each bar every 2–3 days during week one, then weekly.
- Track cure time on a batch card so you don’t guess later.
- Keep away from children, pets, and food areas.
- If scent feels strong, increase cross-ventilation (fan + open door), not humidity.
Soap Craft Lab: Use the phrase “soap making safety guide” on your curing note—future you will thank you.
Safe cutting techniques and labeling each soap bar
Uncured soap can still bite, so glove up with nitrile gloves and don’t freestyle the cut. Soap Craft Lab suggests setting your loaf mold on a non-slip mat; it feels extra until it saves your fingers.
- Cut when the loaf is firm, not crumbly—usually 18–48 hours, depending on recipe and water discount.
- Keep your off-hand behind the blade line; slow is smooth.
- Label right after cutting: batch date, full ingredients list, fragrance allergens (e.g., linalool, limonene) when present.
This soap making safety guide style labeling also helps if you gift or sell bars.
Storing finished soap in appropriate containers
Storage is about letting the bar breathe without letting it sweat. In this soap making safety guide, breathable wins early; sealed wins later, once fully cured and dry.
- Early cure: cardboard box lined with paper, ventilated bin with holes.
- Fully cured: clean, dry storage tote kept away from heat and direct sunlight.
- Separate bold fragrance oils from mild scents.
- Avoid hot closets; warmth can soften hardness and dull scent.
| Container type | Breathability (1–5) | Typical cure-stage fit (weeks) | “Sweating” risk (1–5) |
|---|---|---|---|
| Cardboard box | 5 | 0–6 | 1 |
| Paper bags | 4 | 0–6 | 2 |
| Ventilated plastic bin | 4 | 0–8 | 2 |
| Airtight plastic container | 1 | 6+ | 4 |
| Glass jar with gasket | 1 | 8+ | 4 |
Soap Craft Lab: Soap Craft Lab keeps a simple rule: if you can’t smell a little air exchange, you’re probably sealing too soon.
Disposing of leftover lye solution and tools correctly
Cleanup is where “I’ll deal with it later” goes to cause problems, so keep it boring and safe. This soap making safety guide sticks to basics plus local rules—because drain rules vary.
- Check local regulations for lye solution disposal.
- For tiny residues, dilute heavily with cold water before drain disposal only if permitted.
- Rinse tools (spatulas, pitchers) until no slippery feel remains, then wash with detergent.
Soap Craft Lab: Do not mix leftover lye with acids inside containers; heat and splash risk is real. Do not toss lye water into soil; it can burn plants and mess with pH. Keep one “cleanup kit” bucket labeled caustic so nobody mistakes it.